
This article contains affiliate links. If you purchase through our links, we may earn a commission at no extra cost to you. We only recommend products we’ve thoroughly researched and verified.
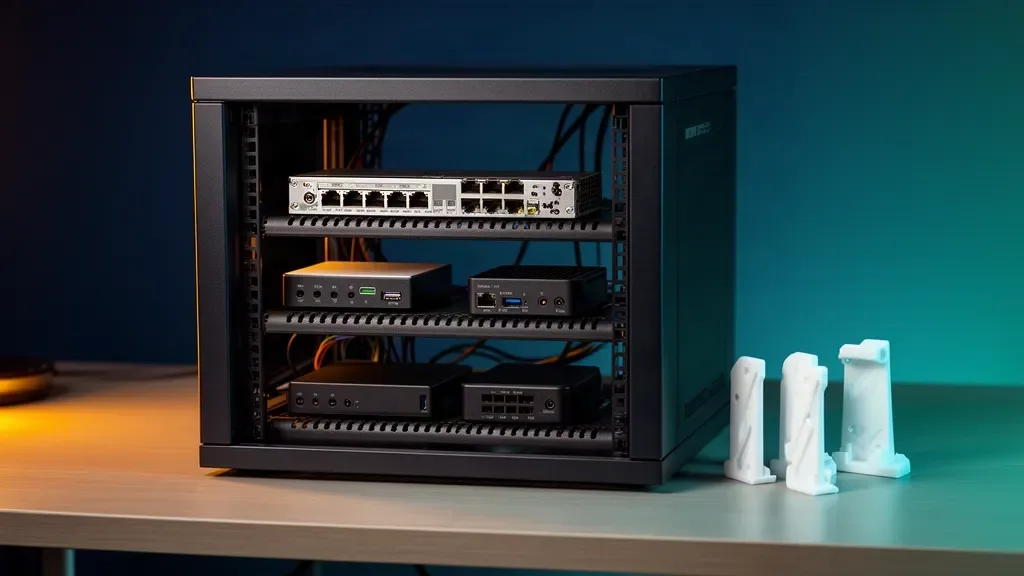
The best network switch for a mini PC rack is not always the one with factory rack ears. In a compact 10-inch build, the practical choices fall into three groups: a shelf-fit desktop switch, a half-width chassis with a community printed mount, or a genuine rack device designed for the rails.
That distinction matters because a switch can fit inside the rack and still be impossible to attach to the front. A small unmanaged switch may be perfect on a vented shelf. A PoE switch may need more depth for its power plug and cable bend. A printed ear kit can make one model look tidy, but it adds a part that you must source, print, fit, and support yourself.
Start with the rack depth and the network workload. The 10-inch mini rack homelab build covers the wider rack, shelf, PDU, and patch-panel plan. This guide narrows the decision to the switch row: whether it fits, how it mounts, and how it stays cool.
The quick answer
Choose a shelf-fit switch when:
- You want the lowest-friction installation
- The switch will sit on a vented shelf inside the rack
- You do not need the front of the switch attached to the rails
- You value easy replacement over a perfect rack face
Choose the GiGaPlus GP-S25-0802P when:
- You need eight 2.5GbE PoE+ ports and two 10G SFP+ uplinks
- You want a metal half-width switch at the rack face
- You are comfortable printing or commissioning a compatible ear design
- The 260mm rack depth gives the rear cables enough room
Choose the YuanLey YS25-0402P when:
- Four 2.5GbE ports with PoE cover your cameras or access points
- Two 10G SFP ports are more useful than eight 2.5GbE ports
- You want a fanless desktop or wall-mount option
- You are happy to keep it on a shelf rather than invent a rack mount
Choose the MokerLink 2G08110GS or Real HD SW8-25G when:
- You need eight 2.5GbE client ports and one 10G SFP+ uplink
- You want a small fanless switch on a vented shelf
- You do not need PoE or VLAN management from the switch itself
Rack fit is not the same as rack mounting
There are two separate measurements in a small rack. The first is whether the chassis can sit on the shelf. The second is whether the chassis can attach to the rails without blocking ports or airflow.
A shelf-fit switch needs enough shelf depth for the enclosure, its feet, the power connector, and the Ethernet bend. Its front can face forward, sideways, or backward depending on the shelf and patch-panel layout. This is often the most reliable answer because the switch remains in its original desktop configuration.
A mounted switch needs a compatible hole pattern and enough support at the rear. The front ears carry the visible rack attachment, but the switch should not hang from two printed brackets while heavy cables pull down on the ports. A rear support or a short shelf under the chassis makes the installation much safer.
The how to rack mount a mini PC guide explains the same shelf-first principle for computers. A mini PC has no rack ears, so it rides on a vented shelf. A shelf-fit switch works the same way. Do not add a printed mounting project unless the rack face solves a real service or layout problem.
What the two RackMate frames give you
DeskPi’s product wiki lists the RackMate T1 at 281 by 200 by 451mm with 8U of mounting height. The T1 Plus is the deeper 8U frame at 281 by 260 by 418mm, with a published internal width of 212mm and mounting points for two 120mm fans or four 80mm fans. Both are open-frame desktop racks, not wall-mount cabinets.
That 212mm internal width is the number most switch shoppers miss. A 10-inch rack is not 10 inches of usable space between the rails. Any switch you want to sit across the rack with its ports facing forward has to be narrower than that opening, with some room left for side vents.
Use the 260mm T1 Plus when any of these are true:
- The switch has a deep metal enclosure
- The power plug exits straight from the rear
- Several Ethernet cables need a relaxed bend
- SFP+ DAC or optical cables extend farther than ordinary patch leads
- A printed ear mount places the chassis farther forward
- The switch sits behind a patch panel and needs service clearance
- The rack will carry a fan because a PoE switch or hot SFP+ module shares it with mini PCs
GeeekPi sells matching 200mm and 260mm vented shelves. Treat 260mm as the shelf’s listed depth, not guaranteed usable equipment depth. Include the rack lip, rail position, connector length, cable bend, and rear airflow in your measurement.
The depth of the Tupavco TP1713 PDU is not published by the manufacturer or any other source we checked. Do not use its unknown depth as a reason to claim that every PDU will fit behind a particular switch. Put the PDU where the cord and outlets remain accessible, then check the complete rear path.
Depth and width budget: the side view
This is the measurement to do before buying. Draw your own version with real numbers for the switch you are considering.
FRONT rail                  REAR
|<------- frame depth ------->|
|[ports] BODY [jack] plug  bend|
|<--- A --->|<- B ->|<- C ->|D|

A + B + C + D <= frame depth| Line | What to measure | Example: MokerLink 2G08110GS on a RackMate T1 |
|---|---|---|
| Frame depth | Published rack or shelf depth | 200mm per DeskPi |
| A: body depth | Chassis depth from the port face to the back panel | 100mm, from MokerLink’s published 190 by 100 by 28mm with the ports on the 190mm face |
| B: rear connector | Power plug or rear cable body | Measure your adapter’s barrel plug; MokerLink publishes a 12V 2A external adapter but not the plug length |
| C: bend | Space before the cable can turn | Measure the actual cable; thick Cat6a, DAC, and power leads need more than thin patch cords |
| D: service gap | Room to unplug without removing the shelf | Leave at least a finger’s reach |
| Width check | Port face width against the opening | 190mm body against the 212mm internal width DeskPi publishes for the T1 Plus, about 11mm per side |
In that example the body uses half of the T1’s depth, which leaves a comfortable 100mm for B, C, and D. The width is the tighter number. MokerLink’s own product images show vents on both short ends of the chassis, so with the ports facing forward those vents sit close to the rails. That still works on an open frame, but do not add solid side panels or pack a cable bundle against either end.
The same budget explains the T1 Plus choice. If a switch body is deeper, if SFP+ cables leave from the front and power leaves from the rear, or if a printed ear moves the chassis forward, the 60mm difference between the two frames is where the plug and bend go.
Switch fit matrix
| Switch | Network layout | Mounting path | Size and depth note | Best use |
|---|---|---|---|---|
| GiGaPlus GP-S25-0802P | Eight 2.5GbE PoE+ ports and two 10G SFP+ uplinks | Community 3D-printed ears or shelf | The ear designer calls it a tight fit; prefer the deeper frame | PoE-heavy rack with a fast uplink |
| YuanLey YS25-0402P | Four 2.5GbE PoE ports and two 10G SFP ports | Desktop or wall mount, shelf in the rack | Leave room for PoE and SFP cables | Cameras or access points with a small port count |
| MokerLink 2G08110GS | Eight 2.5GbE ports and one 10G SFP+ port | Shelf or wall mount, not native rack mount | 190 by 100 by 28mm, ports on the 190mm face | Quiet unmanaged access switch |
| Real HD SW8-25G | Eight 2.5GbE ports and one 10G SFP+ port | Shelf inside the rack | Measure it against the budget before ordering | Simple low-cost access switch |
| MikroTik CRS310-8G+2S+IN | Managed 2.5GbE and 10GbE layout | Rack ears required | Out of stock with its ear kit on Amazon US in late August 2026 | Do not plan around it until both parts return |
A port count does not tell you whether the case fits a shelf, whether a rack ear exists, or whether the rear cable path works. The matrix separates those questions.
The GiGaPlus printed-ear path
The GiGaPlus GP-S25-0802P is the most interesting option when the rack face matters. Its listing identifies eight 2.5GbE PoE+ ports and two 10G SFP+ uplinks in a metal half-width chassis. Rack ears are not an included accessory.
A community designer published rack ears for this switch on MakerWorld and shared them in Jeff Geerling’s mini-rack project. The design includes two rear brackets to help support the weight. The designer’s own note is worth taking seriously: it is a tight fit, and variances in the DeskPi rack and in 3D printing may give different results.
Treat the design as a community project. Check the license, printer material, layer orientation, screw size, hole alignment, and rear support before installing it. A printed bracket that holds the front edge but leaves the rear unsupported can transfer cable strain into the switch ports.
The mount also changes the depth budget. The switch may sit farther forward than it would on a shelf, while the SFP+ ports and power input still need room behind it. Test the full cable bend with the rack empty. Do not discover after printing that the front fits but the rear connector collides with the frame.
The printed-ear route is attractive when you want a clean front row and have access to a printer. It is not automatically better than a vented shelf. A shelf is easier to replace, easier to reposition, and less dependent on a file that may fit one chassis revision.
Check the GiGaPlus GP-S25-0802P on Amazon
The YuanLey PoE option
The YuanLey model we link is the six-port YS25-0402P. YuanLey’s product page lists four 2.5GbE PoE ports and two 10G SFP ports, a 78W total PoE budget with up to 30W per port, a fanless metal case rated for minus 10 to 50 degrees Celsius, and desktop or wall mounting. SFP modules are not included.
That port layout suits a small camera or access-point row. Four PoE ports can cover a few endpoints while the two SFP ports provide uplink or local storage paths. It is a poor fit when every mini PC needs its own copper port or when the rack needs managed VLAN controls.
The YuanLey has no native 10-inch rack mounting. Put it on a vented shelf and keep the PoE ports accessible. A wall-mount design is not the same as a rack-ear design, and drilling an adapter without a measured hole pattern turns a simple switch into a custom hardware project.
Check the YuanLey YS25-0402P on Amazon
The shelf-fit 8-port choices
MokerLink 2G08110GS
MokerLink publishes the 2G08110GS at 190 by 100 by 28mm and 0.49kg, with eight 2.5GbE RJ45 ports and one 10G SFP+ port on the long face, a fanless metal shell, a 12V 2A external power adapter, and an operating range of minus 10 to 50 degrees Celsius. The product page lists wall mounting as the installation method.
This is the natural shelf choice when you want the full eight-port 2.5GbE row but do not need PoE. With the ports facing forward it sits across a 10-inch shelf, and at 100mm deep it leaves half of a 200mm shelf for the power plug and cable bend. The budget above shows why the width, not the depth, is the number to check on this switch.
The switch is unmanaged. That keeps the installation simple, but it also means VLANs, traffic controls, and switch-side monitoring belong elsewhere. If you need those features, do not mistake eight fast ports for a managed network design.
Check the MokerLink 2G08110GS on Amazon
Real HD SW8-25G
The Real HD SW8-25G is another fanless shelf-fit path with eight 2.5GbE ports and one 10G SFP+ uplink. It is the straightforward option when the switch will live on a vented shelf and the rack does not need a visible front-mounted chassis.
Its advantage is the uncomplicated installation. Set it on the shelf, leave the front ports reachable, and route the uplink to the patch panel or the adjacent storage row. Its limitation is the same as the MokerLink: nothing in its listing provides native 10-inch rail mounting, so do not treat it as a rack switch in the hardware sense. We could not find a published chassis size from the maker, so measure it against the depth and width budget before committing to a front-facing layout.
The Real HD is a good match for the starter layout in the best 2.5GbE switch for a homelab guide. This page adds the physical answer that roundup does not: it belongs on a vented shelf inside the 10-inch frame.
Check the Real HD SW8-25G on Amazon
PoE changes the rack plan
PoE adds more than a port label. It changes the cable bundle, the endpoint placement, and the amount of heat the installation has to move. The switch must have enough published PoE budget for the connected devices. On the YuanLey that is 78W in total and 30W on any one port, so four access points drawing close to the per-port maximum would already exceed the total.
Use the GiGaPlus when eight PoE ports and two 10G SFP+ uplinks match the plan. Use the YuanLey when four PoE ports and two SFP uplinks are enough. Do not buy a PoE switch merely because the number looks higher. The unused PoE hardware adds cost and cabling complexity without improving a mini PC that already has its own power adapter.
Plan the cable path before filling the rack. PoE cables may leave the rack for cameras or access points, while ordinary patch leads may stay inside it. Keep the long runs on the patch panel and use short service leads between the panel and switch. The switch should remain removable without pulling fixed cable runs out of the rack.
If you plan to put a copper 10GBASE-T module in an SFP+ port, read the DAC, fiber, and copper 10GbE guide first. Those modules are the hottest option in a fanless switch, and the module vendors publish placement and reach limits that matter in a tight rack.
Managed versus unmanaged in a tiny rack
An unmanaged switch is often the right first step for a small mini PC rack. It reduces configuration work and lets the router or firewall handle the network policy. The MokerLink, Real HD, GiGaPlus, and YuanLey models in this article are not interchangeable on management features, though. Check the exact listing and manual before assuming a web interface, VLAN support, or traffic monitoring.
The MikroTik CRS310-8G+2S+IN would be the obvious managed shape for a 2.5GbE and 10GbE rack, but both the switch and its RMK-2/10 ear kit were out of stock on Amazon US when we checked on August 25, 2026. We are not linking or recommending it as if it were obtainable. If managed switching is a requirement, check MikroTik’s retailer list or choose a different managed model after a separate availability and mounting check.
Do not create a custom rack mount simply to make an unmanaged switch look managed. Mounting hardware does not add VLANs, link aggregation, or monitoring.
Shelf installation checklist
Use a vented shelf rather than a solid plate. The how to rack mount a mini PC guide explains why bottom intakes need open air, and the same rule applies to a fanless switch that relies on convection.
Before installing the switch:
- Fill in the depth and width budget with the switch’s published dimensions.
- Measure the switch’s power connector and the first cable bend.
- Leave room to remove the SFP module or unplug the uplink.
- Keep the switch vents clear of the mini PC exhaust and the rails.
- Decide whether ports face the front, side, or rear before routing fixed cable.
- Add a service loop so the shelf can move forward.
- Label the uplink and PoE runs at both ends.
- Confirm the rack stays stable after the switch and power brick are installed.
The shelf should support the switch without covering its vents. Keep the power brick away from an exhaust path, and do not tie a cable bundle tightly against the switch case. A fanless chassis still needs a path for warm air to leave.
A practical small-rack layout
For a basic 8U rack, put the switch on a middle vented shelf with the ports toward the patch panel. Put the mini PC on a separate shelf so its exhaust does not feed directly into the switch. Keep the PDU low and preserve one open position for service access.
For a PoE build, place the GiGaPlus or YuanLey where the PoE cable bundle can exit cleanly without crossing the mini PC vents. Use the deeper T1 Plus when the rear power and SFP cable bends are tight, and consider its fan mounting points when a PoE switch shares the frame with warm mini PCs.
For a storage-first build, use the 10G SFP or SFP+ uplink for the NAS or fast server and leave ordinary mini PCs on 2.5GbE. The network transfer calculator helps estimate whether that uplink will matter for your file size and storage speed.
Size the battery for the whole rack, not just the computers. The switch, any PoE endpoints it powers, and the mini PCs all sit behind the same UPS, and the UPS sizing calculator turns that combined load into a runtime estimate. Neither MokerLink nor YuanLey publishes an idle draw for these switches, so use a plug-in power meter reading rather than a guess.
When to skip a rack-mounted switch
Keep the switch on a shelf when the rack is beside a desk, the ports are easy to reach, and no front-mounted layout is required. A shelf-fit switch is easier to replace than a custom printed mount and leaves you free to change the chassis later.
Skip a 10-inch rack entirely if you need deep servers, large managed switches, a wall-mounted enclosure, or a high-density PoE installation. The open-frame RackMate format is for compact desktop equipment. It is not a smaller version of a full enterprise cabinet.
Skip PoE if your cameras and access points already have local power and the extra ports will remain unused. Skip a 10G uplink if the NAS and client storage cannot feed it.
Final verdict
For most mini PC racks, a shelf-fit switch is the honest answer. The MokerLink 2G08110GS and Real HD SW8-25G give you eight 2.5GbE ports plus a 10G SFP+ uplink without requiring a custom rack mount, and the MokerLink’s published 100mm depth makes it an easy fit on a 200mm RackMate T1. The YuanLey YS25-0402P is the smaller PoE choice with four 2.5GbE PoE ports and two 10G SFP ports.
Choose the GiGaPlus GP-S25-0802P when eight PoE+ ports, two 10G SFP+ uplinks, and a clean rack face justify the printed-ear project. Use the deeper T1 Plus when the rear cable path needs it. Treat the printed mount as community hardware that needs fit and support checks.
The rack should make the switch easier to service, not harder. Fill in the depth and width budget, use a vented shelf, keep the out-of-stock CRS310 out of the plan, and buy the mounting method that fits the actual workload.
Rack frames used in this guide: RackMate T1 8U on Amazon and RackMate T1 Plus 8U on Amazon.
Frequently Asked Questions
Can a normal network switch fit in a 10-inch rack?
Some compact switches sit on a vented shelf, but that does not make them native rack hardware. The GiGaPlus GP-S25-0802P has a community 3D-printed ear design, while the MokerLink and Real HD shelf-fit models remain shelf equipment.
Which 10-inch rack depth should I choose for a network switch?
DeskPi lists the RackMate T1 at 200mm deep and the T1 Plus at 260mm. Use the T1 when the switch body, power plug, and cable bend fit inside 200mm, and the T1 Plus when they do not. Add the chassis depth, the plug or cable connector, and the bend before you choose.
Does a 10-inch rack switch need rack ears?
Only if you want the switch to attach to the rack rails. A shelf-fit switch can sit on a vented shelf without ears. Community ears can mount a compatible switch, but they are not automatically included, certified, or suitable for every material and printer.
What is the best switch for a small mini PC rack?
Choose the Real HD SW8-25G for a simple shelf-fit 2.5GbE switch with a 10G SFP+ uplink, the MokerLink 2G08110GS when you want a published 190 by 100 by 28mm body that fits a 200mm shelf with room behind it, the YuanLey YS25-0402P for PoE in a smaller six-port layout, or the GiGaPlus GP-S25-0802P when PoE density and a printed rack mount matter.
Is the MikroTik CRS310 available for a 10-inch rack build?
Both the CRS310-8G+2S+IN and its RMK-2/10 rack-ear kit were out of stock on Amazon US when we checked on August 25, 2026. Do not plan a new build around them until both parts are back through a reliable retailer.